October 11, 2015

Stop Motion Animation with Raspberry Pi

Today we tried out a little stop motion animation with Legos using our Raspberry Pi camera and the button we connected to it.

We built a mount for the Raspberry Pi camera module, from Legos naturally. It came out quite nice and it holds the camera firmly in place. Then we set up some Lego roads, a car and some characters and planned a little how we are going to move them. Taking the pictures was quite easy with our setup since we had the separate button and the camera was attached to the Lego base plates, so we didn't have to worry about moving the camera when taking a picture.

Here is a gif of our first try (created using the awesome Imanee PHP library):


It came out OK, but there were a few issues with it so we weren't entirely happy with the result. The background is a bit messy, my hand was in the picture in some of the frames and the biggest issue was that the characters were a little out of focus which made them appear blurry.

Our camera rig, with the extra lens
(attached with blu-tack)
So I Googled around a bit about how to change the focus of the Raspberry Pi camera. And turns out it has a fixed focal length, which is nice most of the time, but for this kind of thing where you want to take pictures where the objects are closer than 50cm from the lens, they will be out of focus. But I found an easy enough solution, which was to buy a pair of cheap reading glasses with lens strength +2, take out a lens and position it in front of the camera. That way the focal length is somewhere around 20-30cm, which is much better for our purposes. And the images did come out better after that, so it was quite easy and cheap hack.

This time we also made the car come from the other direction so it doesn't block so much of the view while it's waiting. Otherwise we did it pretty much the same way. I had to try and keep Kaisla's little sister preoccupied with other things as she really wanted to help also. She did get to push the button a few times to take a couple of frames, but I had to delete some of them as she was a little bit too trigger happy with the button.

Action!


After all the pictures were taken, we moved them to my laptop with rsync and created a video using a command-line utility called ffmpeg. If you are interested in the actual commands, you can check out this great post from Raspberry Pi Learning Resources, which describes each step with a little bit more detail.

Here is the final video:


This time it came out better and we were both happy with the result. Of course there's still room for improvement, for example the lighting is a bit bad since it was evening and there wasn't a lot of natural light. Maybe we'll do some more later on, if Kaisla keeps interested in it. Or maybe we'll try creating a time-lapse video next.

October 10, 2015

Taking photos with the Raspberry Pi camera module

A few days ago I told Kaisla that I have a camera for the Raspberry Pi that can be programmed with code to take pictures, and asked if she would be interested in trying it out. She got very excited and wanted to try it right away and take some pictures.

I hooked up the camera module I had lying around (I had bought it at the same time I bought all the parts for our traffic lights project) into the Raspberry Pi and then we first tried it out by taking a few pics with a command line utility called raspistill. Kaisla typed the command as I instructed, and she wanted to name the file "perhonen" (butterfly in Finnish). First picture was funny since it was upside down, so we had to add some parameters to the command to flip the image.

It worked nicely but of course it gets quite tedious to have to type some commands every time you want to take a photo. So we decided to hook up a button so we can take pictures just by pushing it. I also had some buttons (or actually, tactile switches as they are called) and an extra breadboard (most of these parts are so cheap, it pays off to get some extra while at the electronics shop or if you order online).

Then we had to Google a bit info about how those switches should be wired, since we hadn't used them before. The switch has four legs, but turns out you only need to wire two of them to make it work.

Then we wrote a quick Python script that takes a picture when the button is pressed and saves it to a file named by date and time. After that it was fun to take pictures just by pressing the button.

We have some plans to try to do a little stop motion animation, which this thing is now perfectly suited for. Just need to build some kind of camera mount to hold it in place. I will write a new post about that in a few days. Update: here is a post about our first stop motion animation.

You can find a lot of info about these things online, but here's a good guide from the  Raspberry Pi Learning Resources.

July 12, 2015

Traffic Lights - Part 2: Coding & Building

In Part 1 we planned and did the wiring for our Lego traffic lights and tested that the wiring worked. With the wiring done, it was time to code the traffic lights sequence and build a casing that will hold the breadboard and our Raspberry Pi that will control the LEDs.

Programming the traffic lights


We already had a little experience with ScratchGPIO after our Robot Antenna project, so it was a natural choice to also program the traffic lights with. The actual logic is quite simple, and we were already familiar with it since we have been observing real traffic lights lately while driving. We had to discuss the timing a little bit, but mostly Kaisla had pretty good initial suggestions for the timings. We also had to do some trial and error with turning off the lights at correct times.

It was an exciting moment when we finally nailed it and had working traffic lights that change exactly like real traffic lights. We just looked at it for a while, and then of course showed it to little sister and mommy too.

Afterwards we also ported the logic to python so that it will be easier to run remotely on the command line, without the need need to start an X session. I did most of the typing of the python code, but we went through each line side by side with the Scratch version so we could see that it does exactly the same thing.

Building the Lego case


We had already done a kind of front panel in front of the bread board, you can see it in the image above (don't mind the bunny head, it's a speaker and not related to this project). The plan was to make the whole thing portable so that the case holds everything that's needed for it to run, including the Raspberry Pi and a power supply so there are no wires coming out and limiting the range where it can be played with. For a power supply we are using a regular cellphone USB "power bank" (that can be used to charge cellphones on the go) that I already had lying around. We also have a WiFi dongle in the Raspberry Pi so we can connect to it remotely through SSH without the need for it to be plugged in to a display or a keyboard. We also have a Lego compatible base plate in the PiBow case that we have for the RPi, so it was easy to attach it with Legos.

It was still quite hard to get everything to fit nicely so that the power cable and GPIO cable have enough free space. Also the power bank was a little tricky to get to stay in place nicely. The final thing came out quite massive in relation to just the LEDs, but that's ok. It's also quite sturdy and now it's very portable so we can easily move it around without having to plug in anything.

I already had an SSH client app in my phone that I can use to connect to it, but typing CLI commands without a proper keyboard is a little annoying so I found a better app. It's called RasPi Check and it allows you to save the connection details of the RPi and also a list of commands that can then be executed easily later.

So now we can take the whole thing and place it anywhere and then start and stop the python script from my phone with a press of a button. How cool is that!

There was a sample python script that came with the Raspbian installation called blink11.py that toggles GPIO pin 11 on and off with a one second timeout. We also copied that script and changed the pin to 13, which is the pin that our yellow LED is connected to. So now we also have a script to run when the traffic lights are "out of order".


Conclusion


We have played with the traffic lights a few times already, and even though it's just "one sided", it has worked nicely and we've had a good time. But the final product is not the most important thing, it's the project where we have again learned a lot and most importantly spent time together and had fun.

Kaisla has already asked what are we going to do next now that this project is ready, and we have a few ideas. In the parts that I got before starting our exploration with hardware, there were also some buttons (tactile switches to be exact) that Kaisla would like to use for something. So maybe we will do a button that pedestrian Legos can press to get the traffic light to change, or maybe something totally different. We'll see, but I got the feeling that she definitely wants to keep on making "things that work".


July 8, 2015

Traffic Lights - Part 1: Wiring

When we started our Raspberry Pi traffic lights for Lego cars project, we already had little experience with wiring LEDs and we started by planning the wiring. Instead of drawing the plans by hand, we used a free program called Fritzing. Fritzing is easy to use and has most common components that can be dragged and connected together to create circuits. It then automatically creates a circuit diagram, which is nice. 

Fritzing Breadboard view
Fritzing Schematic view
It was our first time using a breadboard so we had to learn how to use it. It's pretty simple, you just have to know which way the rows are connected. Most of the rows are connected horizontally, but larger boards have two vertically connected, so called power rails, on both sides. Then there are smaller ones that only have horizontally connected rows. We have one of both, but we are using the larger one for this project because it's the one that's Lego compatible, so we can build stuff around it.

After all the planning done, it was time to start actually wiring. We did a quick test to just light up one LED on the breadboard first and it worked fine. Then we just followed our plan and wired all the resistors and LEDs. We had to cut some of the jumper leads with scissors to modify their length so we got the colors just right according to our plan. Other than that it was pretty smooth sailing and Kaisla did most of the wiring, I just needed to help a little here and there.


With wiring done, it was time to test it. We obviously hadn't programmed the traffic lights yet, so we needed some other way to test that the wiring works correctly. I found an awesome Android app called GPIO Tool For Raspberry Pi that connects to RPi using SSH (which I had already set up previously) and allows to set GPIO pins on and off by just pressing buttons on the phone.

Everything worked correctly and it was fun to control the traffic lights manually with the app. If only there was a way to control real traffic lights with an app the same way!


We have already come a long way, but there's still lot of work to do. We must build a "casing" or structure of some kind (using Legos) to hold the breadboard and the Raspberry Pi and of course we must do the actual programming of the traffic lights. We have been observing the traffic light patterns while driving so we know how to do it correctly. But this is enough for now, to be continued in Part 2: Coding & Buiding.

June 28, 2015

Robot Antenna - Getting Started with Hardware Hacking

After our latest Scratch game project we haven't done much coding, just played few games like Lightbot on iPad. But since I have a Raspberry Pi, I started thinking she might like to do some coding with physical things rather than just something that's on the screen. And I would like to learn more about hacking with hardware myself, since I'm not that familiar with electronics. I talked about it with her and she got really exited and had an idea for a first project almost instantly. She wanted to build traffic lights for lego cars! That sounded like a great project, so I started looking what kind of stuff would be required for a project like that.

After Googling around a bit and brushing up my knowledge of basic electronics (that had gotten a bit rusty since I haven't done any electrical work after high-school), I had an idea how we would do it. I ordered various electronics bits and bobs from the net, such as LEDs, jumper wires, resistors, few breadboards, switches, a GPIO cable etc. You can get this stuff from pretty much any electronics shop, either online or if you have a brick and mortar one nearby. I ordered a shipment from Pimoroni since they have all kinds of nice accessories, for example a lego compatible breadboard, a lego compatible base plate for the Pibow case I already had, some colourful USB and HDMI cables and SD cards etc.

While waiting for the shipment to arrive, I talked to Kaisla about electronics and tried to teach her some basic concepts. Like what is an electric circuit, how current flows in the circuit and how we need to adjust the current to our needs with resistors and how switches work by breaking the circuit. She seemed to understand most of that pretty well and even came up with some examples from real life, like the light switches in our house. I also talked to her about how dangerous electricity can be and that we must be cautious whenever we're working with electronics. We also learned that it's important to plan the electric circuits and how it's usually done by drawing a circuit diagram and she drew a simple one with one LED and a resistor.


Robot Antenna

Before going ahead with the traffic lights project, I decided that we should try something a little more simple first. I found this nice beginner project called Robot Antenna in the official Raspberry Pi site that has lots of good learning resources. It involves a very simple circuit with one LED and one resistor and then it can be programmed using a modified version of Scratch, called ScratchGPIO, with the same familiar user interface that we are already used to with Scratch.

When we received the shipment, we were both excited and Kaisla was very happy about the things I had gotten her, like a pink SD card and a purple USB power cable. She was very pleased that she had her own memory card and wanted to decorate it with a butterfly sticker.

Before starting with the robot antenna project, we first tried if we could just light up a LED without any programming involved. The GPIO pins on the Rasberry Pi have different purposes, some need to be programmatically turned on but some have constant power output (you can read more about them here if interested). So we put together the circuit of one red LED and one resistor (we used 330 Ohm like in the instructions for the robot antenna) with some jumper wires and connected to the 3.3 volt power output pin and a ground pin on the RPi. It was an exiting moment when I plugged in the USB power cable for the first time, but the LED did light up! We then tried all the other different coloured LEDs I had bought, green, yellow and blue, and they all light up nicely (even the blue did light up without changing the resistor, even though it requires more voltage).


Next Kaisla started working on her robot. The only requirement was that it should have an antenna, otherwise it was all left to her imagination. She was sceptical at first whether she could draw a good enough robot, but after some encouragement she did it and it came out really nice and she was really pleased with it. We then cut it out and glued it to an empty kitchen paper roll and I made hole for the LED at the top of the antenna.

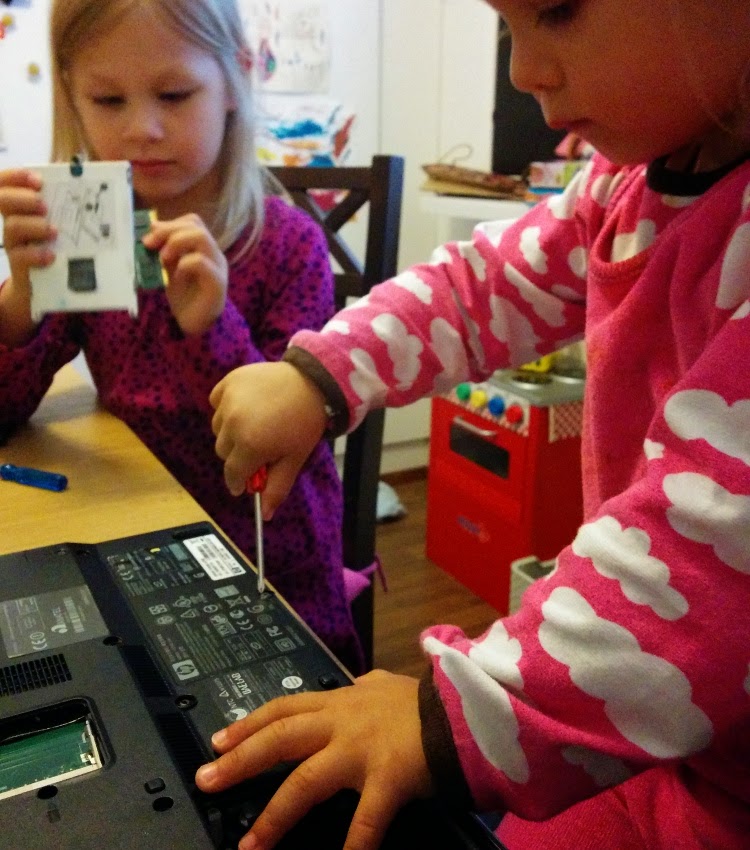
Then it was time to combine all of this. We needed to use one of the programmable output pins now instead of the one with constant power and we also put the RPi back into it's case so we needed to connect through the GPIO cable now. So we changed from female-to-female jumper wires to male-to-female wires for the ones that connect to the RPi. We put the wires and LED inside the robot and pushed the LED through the hole and it fit just nicely. We then booted up the Raspberry Pi (we are using the "default" Raspbian OS on it), but ran into some troubles since the ScratchGPIO doesn't come preinstalled on it and I hadn't configured the WiFi on it yet so we couldn't install it right away. I had to Google a little bit for instructions on setting up WiFi on Raspbian and Kaisla got bored. She went on to do a puzzle (one with Elsa from Frozen) while I 
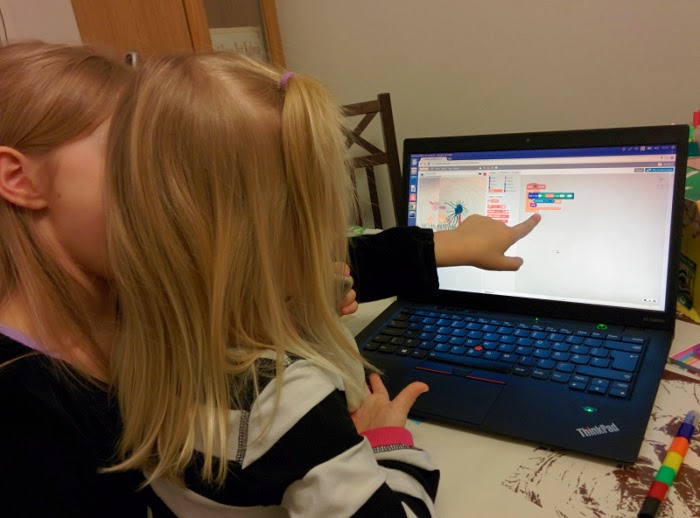
got the WiFi set up and installed ScratchGPIO. After that we could finally do the actual coding, a very simple program at first with just a loop of 10 iterations that sets the pin on, waits one second, sets the pin off and waits another second and executes by pressing the spacebar key. With that, we had our very first program that interacts with hardware we had wired ourself. It worked as expected and Kaisla was very proud of it and wanted to show it to her mom and little sister.


All in all, it has been a very interesting first hardware project for both of us and we have both learned a lot. Next we will start planning the traffic lights project, and I'll write more about that later.

April 6, 2015

Owl flies - coding our second Scratch game

After all the graphics done and a pretty good idea how the game is going to work, it was time to start coding.

Scrolling background


I knew we were going to need a scrolling background and had some ideas how to implement it, but decided to do some research beforehand. I found this nice wiki page that explains few different scrolling concepts and we ended up using a variation of one of the solutions presented in that article. Just had to modify it a little so that it scrolls all the way from outside of the view to the other side.

Owl flies


Next it was time to add the owl. As I said in the previous post, we had two owls, one that sits on a tree branch and the one that flies. Adding the sitting owl was simple, just drag it to the correct position and scale it to appropriate size. We decided that pressing space bar starts the game, so we hide it when that happens. Because lots of other stuff also needs to happen as the game starts, I thought it would be good to implement the game start as an event that is broadcast from one place. We discussed few different analogies for the broadcasting of an event, she seemed to like the idea of sending a message by mail the most. So, when the game starts we broadcast an event "lennä" which is Finnish for "fly" (in imperative form).

The flying owl required some more coding. It needed to appear when the sitting owl disappears and then start moving. Because we have a scrolling background, our owl can remain static horizontally and only move vertically. We decided to use the space bar key for flying as well, so that the owl descends if the space key is not pressed and ascends if it is pressed. This logic required a simple loop that runs as long as the game is playing and inside it a simple if condition; if space key pressed, then move owl up, else move owl down. Also needed a small wait inside the loop so it doesn't run too fast. After that it took us some experimentation to get the right "speed" for the owl's ascend and descend and smoothness of the movement by adjusting the wait time and the amount of pixels for the movements. But it was fun to do and we had a few laughs while making the owl or the background move too fast.

Code for our flying owl.


Sound effects


Sound effects are always a fun part of creating a game. This time Kaisla wanted that I do the owl sounds and she does mosquito buzzing. We recorded the sounds in Scratch, edited them a little bit and added some to the game right away.

The owl is hungry


Now that we have a flying owl, we can finally get to the actual objective of the game: catching mosquitoes. Kaisla hadn't drawn an image of a mosquito, so we looked for one in the Scratch sprite library and found one that was good enough for our use. Maybe we will add a custom image later.

We needed multiple mosquitoes on the screen and they needed to scroll with the background (to appear staying static) so we took the scrolling logic from the background and modified it a little bit so we can set a custom starting point for the image to appear. Kaisla decided that the owl needs to catch 10 mosquitoes, but that sounded like too much to be on the screen at the same time so I thought that maybe we could have only a few sprites that we can reuse, by positioning them again after being eaten.

For this we needed to explore a new concept, randomization. After being eaten, we move the mosquito to a new position that is outside of the screen horizontally and then assign it a random position vertically. We encountered a few bugs while coding this that caused for some funny side effects, like the mosquito getting "stuck" to the owl's beak. But we finally got it working well and now the game could actually be played.

Because Kaisla is so careful about the details, she soon pointed out that there are too many mosquitoes because she had decided there should only be ten. So we needed a way to count the number of mosquitoes the owl has eaten. We had explored the concept of variables a few times before and she didn't have much trouble grasping the idea when I explained it as something like writing down a note on a piece of paper so it can be looked up later. We also discussed variable naming and I said that it's always good to name them after the values stored in them so that it's easier to understand later. She seemed to grasp this concept well and named the variable "hyttysiä syöty" (Finnish for "mosquitoes eaten").

Scratch has a nice feature where you can choose that it shows the contents of a variable on screen while playing so we didn't have to implement that by ourselves to see the value increase as intended.

Kaisla explaining the game to her little sister.


Finishing touches


We still had a few items left on our TODO list, like making the owl flap it's wings and making the owl go back to sitting on the tree branch after it has eaten 10 mosquitoes. We have since added the wing flapping effect by creating a second "costume" for the flying owl that we change in the loop. I just cut out the wings in an image editor and rotated them to create another one with the wings in a more upright position. It took a little tweaking until I got it to look good enough for her but I think it came out quite nice in the end.

We haven't done any coding for a while now and the owl returning to the branch is still not done. But we'll get to it sometime in the near future. Here is the game in it's current state, so you can check out all of the code, or just try it out. And why not leave a comment if you like it.

Update: And as I just discovered that Scratch games have embed codes, here is the game inline so you can try it out right here (if you're on a browser that supports Flash).

March 24, 2015

From idea to owl - designing our second Scratch game

Few weeks ago we started designing our second Scratch game. We were outside walking home from the playground and we started discussing something about games and the conversation led to us deciding to build another game. I asked if she had any ideas for the game and it only took her a couple of seconds to come up with an idea for a game where an owl flies and catches mosquitoes. The level of detail that comes with her ideas is always very rich and I have to try and keep it simple so it's actually something we can accomplish with any decent amount of work.

I instantly started thinking it would be easy to implement such a game with a scrolling background, so I tried to explain the concept to her a little bit. But I sensed it was not going down that well so we talked about the details for the background graphics for a bit more before we were home.

Graphic design


Demonstrating
scrolling background.
We decided to draw the graphics on paper again. She started with the backgrounds (we needed two so we could make them scroll) and they came out really well. I decided to illustrate the background scrolling effect to her again, but this time show it by example. So we also made a "screen" by drawing a frame on paper and cutting out the middle with scissors. Then she held the frame little bit above the table surface and I moved the background drawings beneath it. I think she understood the concept this time and was excited about how it will look on the computer.

But first we needed to draw the owl. Or actually we also needed two owls, because even though I tried to keep things simple as I said above, she was adamant that the owl must first sit on a tree branch and only start flying after a button has been pressed.

She was a little nervous about whether the owl would come out good enough, so I suggested we look up some example pictures from the internet. We headed to Google image search and found some nice colourful owl pictures. She needed a bit of help to get the body shape right on the symmetrical sitting owl, but it came out amazing, much better than what I had expected. And then she drew the flying owl all by her self, without any help from me. That one also came out amazing and she was very pleased with herself and ran to show it to her mummy.


With the drawings done, she was already eager to start coding, but we didn't have time to start right away. I took pictures of the drawings and later processed them on an image editor. Nothing much, just stuff like cut out the owls and straighten the backgrounds and some small color corrections etc.

Next time we'll fire up Scratch and start with the actual coding. But all of the designing, preparing and modelling is also fun so we had really good time.

March 21, 2015

Rapunzel climbs - our first Scratch game

After learning about some basic programming concepts with other tools and environments (more about these in the Introduction post), I thought we'd try out Scratch and see how it goes. It was over six months ago, so I don't remember exactly what conversations we had and whether we talked about game development before or after looking around in Scratch. But I do remember it didn't take long for her to come up with an idea for a game.

Graphics


I thought it would be nice to combine the "real" world with the digital game a little bit, so I suggested that she draws the background on paper and then I'll "move the picture inside the computer". She was really enthusiastic about the idea and started drawing immediately. The game is about the princess Rapunzel climbing up her tower, so she needed to draw the tower.

She was a little concerned that the lines for the tower walls would not be straight, so I suggested that she could try to use a ruler. We hadn't used a ruler that much before, so it was a nice exercise and the tower came out really well. She was very focused on the drawing and it came out really nice, much more details than what she normally otherwise draws. I only helped a little bit with the roof tiles.

Then of course we needed Rapunzel and also Flynn (the thief from Rapunzel movie) and some rope. I found some images from the internet and cut out backgrounds with an image editor.

Game mechanics


The  actual game mechanic is pretty simple, move the Rapunzel characters sprite up when space button is pressed. Kaisla also wanted to add some sound effects, so we recorded some sound inside Scratch and added them to few key points, like the beginning of a new game and then my voice if Flynn wins (saying "eka ylhäällä", which is "first on top" in Finnish) and her voice if Rapunzel wins (saying "minä voitin", which is "I won" in Finnish).


Multiplayer


At first we had made Flynn climb by himself, with a loop that moves him up a bit and waits a second. But later we decided to make a multiplayer version so that I can play with Flynn and we can compete against each other. So we changed it so that pressing the up arrow key moves Flynn up. This turned out better than I had expected, it has been really fun to play after that. We have played it many times just for fun, without any programming. And Kaisla has also played it with her little sister Sohvi.

You can check out the final game here: Tähkäpää kiipeää (Rapunzel climbs). Why not try it out and leave a comment if you like it.Click the green flag to start a new game (and the blue rectangle on top left corner to make it bigger).

March 10, 2015

Introduction


This is a blog about the adventures I have with my daughter Kaisla as we learn to code and do other computer related stuff. She is 5 years old (at the time of writing this in March 2015) and we have been doing little "computer exercises" for a while already, mostly inspired by the Girls Can't Code blog and with some iPad apps etc. In this introduction post I will go through what kind of things we have already done together and what we have learned along the way.

I think it was a little over a year ago when we first started. She seemed quite interested whenever she saw me working on my computer and sometimes asked if she could "write on daddy's computer". I let her type with Word (put CapsLock on, big font size and pink color) and she would happily spend 20 minutes typing big bright letters on the screen.

After a while we started to really use the computer and I created a profile for her on my Ubuntu laptop. She was quite excited to pick her own password and desktop background image (nice butterfly we found using Google image search). Then we fired up the Terminal and started to explore the wonders of command-line. We learned how to create and edit text files with nano and I also created an alias "sano" (Finnish for "say") to espeak with Finnish language switch so we could make the computer speak. This was really exciting and would provide lots of fun for many "lessons".

And of course we explored the true power of Unix command-line by combining our skills with the pipe operator, we saved words to a file with nano and then piped that to "sano" which would then speak the file contents. Oh, what a joy when the file from earlier computer lesson would still be there next time and could be spoken out again. Our favourite one was a file with "1 2 3 4 5 6 7 8 9 10 täältä tullaan" (Finnish for "here I come", what you say after counting when playing hide and seek).

Getting started with programming


After a while it was time to get our hands dirty and start coding. I think the first programming we ever did was with Turtle Roy, a nice browser based programming environment where you can make a turtle (or other characters) move and draw on the screen. It is text based programming, but we were already quite used to typing commands as text after using the command-line. We have also used other, more graphical programming environments like Scratch and Lightbot game on the iPad. I have listed these and more links in Resources page.

She really likes Lightbot and has gotten pretty good at it, last time we did a recursive function which was loads of fun. We also go back to Turtle Roy every now and then, it's nice how it's so visual even though it's text based programming and every time she wants to draw more complex shapes with it so we have to learn some geometry to get all the shapes and angles right etc.

Taking things apart

Hardware work with little sister.

Many people today, even young people who use computers every day and are thought to be computer savvy, don't really know how they work inside. When I was a kid we always assembled our computers together with my dad. And we learned a lot about how they work while doing that. Today when people have their iPads and MacBooks, it's not that easy to really get a look inside a computer and take it apart. Luckily there are thinks like the Raspberry Pi that don't try to hide the computer inside a pretty shell that cannot be opened.

After we had started saving files on the computer, we started talking about how the computer memory and hard drive works. This naturally led to me promising her that we'll open up a computer and look inside. We first dismantled an old desktop computer to get a better look at how everything is wired together and discussed what each component does. Later I also let Kaisla and her little sister take apart my old laptop which wasn't working any more (picture above).

Game development


Once we started exploring Scratch, it didn't take long until she started thinking about developing a game. You can read more about our first game in a separate post.

We are currently developing our second game and I think I need to write at least a few posts about that too (Update: From idea to owl - designing our second Scratch game). Developing games together has been very entertaining and we have learned a lot. More info coming in future posts. Another dad developing Scratch games with his son has also inspired me to create this blog, so check out Games by Devon.

Closing thoughts


Learning about computers and coding has been very educational and we have had a lot of fun together, but most importantly I have spent time together with my daughter. Obviously it's not the only thing we do together and sometimes there are weeks or even a month when we don't do anything with computers, but so far we have always come back, either by her request or by my suggestion. It's something that I am interested in, and she enjoys it also. Programming is not for everyone and I'm not saying every parent with 5 year old kids should teach them programming, especially if the kid does not seem interested in it. But it's a great way to spend time together and learn new things if it's something that both enjoy.

If you have any thoughts, experiences with similar things or just comments about anything, please leave a comment below. And check back later for new posts.